

Introduction
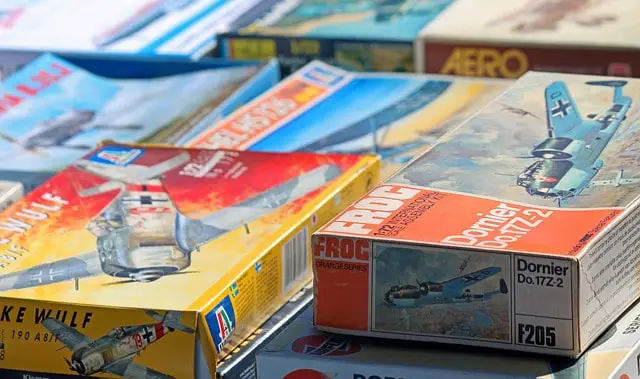
Plastic model kits have been a popular hobby for generations. In the past you could go to a hobby store and pick out a small box that contained plastic parts to build a car or airplane or some other miniature replica of a real thing. Brand names like Revell, AMT, Monogram and Entex were among the most popular ones, and they still are as a matter of fact.
Each kit contained several racks of plastic that each had the parts of the item you were building attached to it. You’d gently break off each piece of plastic and assemble the vehicle according to the instructions, often using some liquid cement glue to hold each piece in place. Some sets even required you to paint various parts, too.
Now, you can easily find similar sets online from around the world with a much wider range of things to build including cars, aircraft, helicopters, aircraft carriers, motorcycles and more.
There’s something deeply satisfying about building a miniature version of a favorite car, plane, or other vehicle, and watching it take shape under your hands. If you’re interested in trying out model building for the first time, you’re in the right place. This article will provide you with some tips and guidance to help you choose your first model kit, gather your tools and supplies, prepare your workspace, and assemble your first model.
Choosing Your First Model Kit
There are hundreds of different model kits on the market, so choosing your first one can be a bit overwhelming. Here are some factors to consider when selecting a beginner-friendly model kit:
- Skill level: Look for kits labeled “beginner” or “easy assembly.” These will typically have fewer parts and less complex assembly instructions. These sets tend to snap together without the use of glue or painting.
- Type of model: Consider what type of model you’d like to build. Popular options include airplanes, cars, ships, and military vehicles.
- Brand: Some model kit brands are known for their beginner-friendly kits, such as Revell, Tamiya, and Airfix.
With these factors in mind, here are some recommended beginner model kits to get you started:
- Revell SnapTite F-16 Fighting Falcon
- Tamiya Subaru Impreza WRC Monte Carlo ’99
- Airfix Quickbuild Bugatti Veyron
Gathering Your Tools and Supplies
To assemble your first model kit, you’ll need a few tools and supplies. Here are the essentials:
- Cutting tools: A pair of scissors and a hobby knife (such as an X-Acto knife) will help you cut and trim parts as needed. You can generally bend the plastic parts out of the mold but it could damage the edges if you aren’t careful.
- Glues and adhesives: You’ll need a glue that’s specifically designed for plastic model kits, such as plastic cement or cyanoacrylate (super glue). Some kits may come with the glue included.
- Paints and brushes: To paint your model, you’ll need a small selection of hobby paints and brushes. Look for paints labeled as “acrylic” or “enamel.” Again, if your chosen kit requires paint it may come complete with the required colors and brush included.
- Tweezers and other small tools: A pair of tweezers and a set of small pliers or clamps can be useful for holding small parts while you work. These can come in very handy.
Optional tools and supplies include:
- Sandpaper and files: These can help you smooth rough edges and prepare parts for painting.
- Decals and stickers: Some model kits come with decals or stickers to add additional detail to your model.
- Clear coats and sealers: A clear coat can help protect your finished model and give it a glossy finish.
Preparing Your Workspace
Before you start assembling your model, it’s important to set up a dedicated workspace. Here are some tips:
- Find a flat, stable surface to work on, such as a desk or table.
- Cover your workspace with a plastic sheet or newspaper to protect it from glue and paint spills.
- Keep your tools and supplies organized and within reach.
- Make sure you have good lighting to work by.
Assembling Your Model
Once you’ve chosen your model kit, gathered your tools and supplies, and set up your workspace, it’s time to start assembling your model! Here’s a step-by-step process for building a plastic model kit:
Prepare the parts: Before you start assembling your model, take some time to identify and organize all the parts. Use a pair of scissors or hobby knife to trim away any excess plastic, and use sandpaper or a file to smooth any rough edges.
Cutting and sanding: Follow the assembly instructions to cut and sand the parts as needed. Be careful not to cut or sand away too much material, as this can weaken the parts.
Gluing and fitting: Use your chosen adhesive to glue the parts together, following the assembly instructions carefully. Be sure to use a small amount of glue, and hold the parts together firmly until the glue dries. You may need to use clamps or tape to hold larger parts together.
Painting and detailing: Once the glue has dried, it’s time to paint your model. Follow the assembly instructions to determine which parts need to be painted, and use your hobby paints and brushes to carefully apply the paint. You may need to apply several coats of paint to get the desired effect. Once the paint is dry, you can add additional details, such as decals or stickers.
Troubleshooting tips and hints
If you run into any issues during the assembly process, don’t panic. Here are some common problems and how to troubleshoot them:
Parts won’t fit together: If the parts won’t fit together, double-check that you’ve trimmed and sanded them correctly. You may need to gently sand the parts further to get them to fit together properly.
Glue smears: If you accidentally get glue on the wrong part of your model, don’t worry. You can use a small amount of acetone or nail polish remover to clean it up.
Paint smudges: If you smudge the paint while it’s still wet, you can use a cotton swab dipped in rubbing alcohol to clean it up.
Finishing Your Model
Once you’ve completed the assembly and painting process, it’s time to add the finishing touches to your model. Here are some steps you can take to give your model a polished, professional look:
Decals and stickers: Apply any decals or stickers that came with your model, following the assembly instructions.
Clear coats and sealers: Apply a clear coat or sealer to protect your finished model and give it a glossy finish.
Conclusion
Plastic model building can be a fun and rewarding hobby, and with the right tools and techniques, anyone can get started. By following the tips and guidance outlined in this blog post, you’ll be well on your way to assembling your first model kit.
As you start out, you might choose a snap-on kit that requires no glue or paints as they tend to be easier. Then you can work your way up to more sophisticated models if you desire.